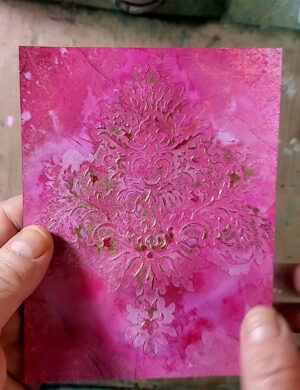
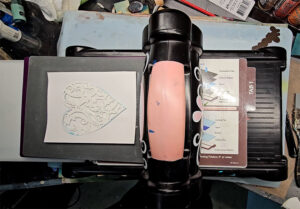
Well now that we have the shape of the drawing looking a bit better, it is time to have some fun! The drawing is still in black and white, but I wanted some color. And texture. So I took one of the prints from one of my Gelli Art Printing Plate sessions and brought that into Photoshop as another layer. Since that layer at this point would be sitting on top of the drawing, in the stack of layers, you can’t see the drawing now. However, we can fix that with something called “Blend Modes”.
If you look to the top right of your layer’s palette, you could change the Opacity of the texture layer and you would then be able to see through the top layer to the image of the drawing below. This can sometimes work depending on the look you are going for. It is the equivalent of using vellum, or tracing paper, or tissue paper on a collaged piece. If that top paper is translucent enough, you can see the layers underneath. However there is a better way.
If you look to the top left of the layer’s palette, you will see a pulldown, that by default is set to “Normal”. This is a list of blending modes, and they determine how that layer, that you have selected at the time, will interact with the layer(s) underneath. There a lots of folks who understand the mathematical calculations of how black, white and colors will interact, but I am not one of them (sorry, Dad!). I usually just scroll through the different choices to see what things look like in the different modes. As I have mentioned in another post, if I know I want to lighten something, I will usually use lighten or screen mode, and I will use darken or multiply for a darkening effect. However, there are lots of other modes including ones that reverse colors, and so you can get some surprising and cool effects as you wander through the list of blend mode choices. It is especially interesting when you have 2 layers that both have colors and patterns.
In this case, I used a blend mode of Overlay. Actually, I used a my Gelli Art prints a couple of times, and some used other blend modes like lighten and darken, and some of these layers were masked to only interact with certain portions of the drawing. See more about this later.
I then decided that I wanted to black out some of the space behind the girl. A quick way to do this is to use the Ctrl key (command on a Mac), and click on the layer with the subject, in my case the girl. NOTE: I had no background around the girl’s head at this point so this trick will work: when you control click on a layer, it will select the non-transparent areas of your layer. In this case, it selected the girl’s head. Since I really wanted to select the background, I used Select->Inverse (shortcut is Ctrl-I) to change the selection to the opposite, which is the space surrounding the girl’s head.
Then, I used an adjustment layer of Solid Color, and chose black as the color. The Solid Color adjustment layer will create a new layer filled with the color black, but in this case, the girl, which is not selected, will be masked out. So, only the background is covered with black- the girl is left looking like she did before the adjustment. Remember that Adjustment layers are found at the bottom of the layers palette, and the icon looks like a half black/ half white circle.
When you choose an adjustment layer, a layer mask is automatically created for you in that adjustment layer. It will show up as a rectangular thumbnail, next to the thumbnail of the actual layer image, in the layers palette. Usually it is all white, allowing the adjustment to be seen/applied through to the layers below it. However, if you have a selection at the time, when you choose to create an adjustment layer, only the area that is selected at the time will be filled with white. The rest will be filled with black, and just like black paper, you can’t see through it, so the adjustment will not show in the non-selected portion.

You can also use layer masks directly on a “normal” layer (as opposed to an adjustment layer), in order to hide some of that layer. If you choose a layer in the layer’s palette, and select a portion of that layer, you can then choose the button to create a layer mask. The layer mask will show up as a rectangular thumbnail, next to the thumbnail of the actual layer image, in the layers palette. The “Create Layer Mask” button is down at the bottom of the layers palette, and it looks like a square with circle in the middle of it. Now when you click on the “Create Layer Mask” button, only the area that is selected at the time will be filled with white in the mask. The rest will be filled with black, and just like black paper, you can’t see through it. So the portion of the layer that was not selected, and has the mask filled with black, will not be visible. Unless you delete the layer mask, or paint with white over the black portions of the mask. Then those portions of the layer will be visible again. This is a nice way of “removing” a portion of an image in a layer, without actually deleting the pixels. So if you want some or all of that image back, you can either paint with white on the mask, and that will reveal the hidden portion or remove the mask entirely to show that entire layer again. Just make sure that you have clicked on the layer mask thumbnail in the layers pallete, if you want to paint on the mask.
I played with several copies of the Gelli Art print and sometimes I used layer masks to only show portions of that particular layer. I used different blending modes to lighten the texture over the girl’s face, and overlay or multiply in other areas.

Then I added color to her lips and eyes, just like I added black to the background, and just masked off everything in the image except for her lips and eyes respectively. I used some cool eyelash paint brushes to paint on eyelashes.

Finally I applied some more textures and colors using more of the darkening blending modes to darken the area surrounding the girl. And I added a photo that I had taken of some Holiday lights to give that sort of “Bokeh” effect. In order to get that shot, I took the picture at night and first focused on a tissue held in front of the camera. Then I took the tissue away and snapped the picture and it blurred what it thought was the background, which was actually the lights.
More blending, and she was finished. For now ;-).

I love playing with Photoshop with my drawings. I can get some cool effects by combining drawings with Gelli Art prints and photos. The sky is the limit!! Enjoy!