This week is another installment in the progress on the Photoshop girl. I am going to intersperse the next few lessons with other stamping posts, since Mom (who is my most faithful reader 😉 ) doesn’t do Photoshop. But for this week, let’s discuss Puppet Warp.
I’ve talked about Puppet Warp in Photoshop before. I love it for tweaking small sections of my work that are off- usually the eyes, or nose, but sometimes I even use it for the shape of the face. Puppet Warp gives you a little bit better control than the Edit->Transform->Warp tool does. So you can warp small sections of the image while keeping the rest of it intact.
Note that this tool is only available in later versions of Photoshop. If you have earlier versions you won’t have this tool, but you could try the Liquify filter instead, as we discussed last week.
Note that with Puppet Warp, I always copy the image onto a new layer and make edits to that copied layer. Use control-J (command-j on a Mac) or right mouse button click on the layer in the layer’s panel and choose Copy Layer.
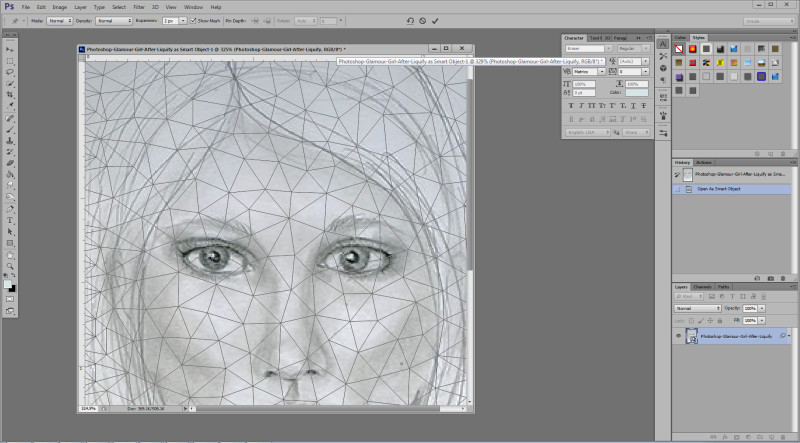
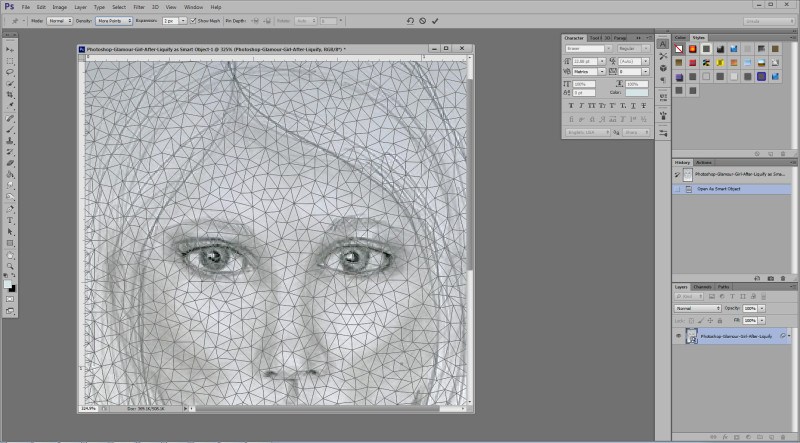
When you choose Puppet Warp, you will see your image with a “mesh” overlay- a pile of lines that describe the contours of your image. You can change how many lines you see, or how dense your mesh is, by using the control on the top for Density. The default is normal, but you can choose to use fewer or more points. For tweaking small areas like eyes, I generally change the Density setting to more points.
Then I usually set points around the whole of my image to keep the outline or general shape intact. You will see this in action- if you don’t set points, once you start moving things parts of your image that you don’t want to change might start moving on you. If that happens, just un-do and go around the outline of your image and set points in the corners and in the middle of each edge.
In Puppet Warp, your cursor will look like a little thumbtack. To set points just click on the image where you want to put it. I set points around the perimeter of the image as I described earlier, and then I narrow in and set points around the perimeter of the area I want to move. Often I also set a few points surrounding that perimeter of what I want to move, so the keep the immediate area outside of the move area intact as well.
The next step is to click on the points that you set on the area that you wish to warp. When you click on a point you already set, you then can drag that point to start to warp that portion of the image. My suggestion is that you do a little at a time, so that you can see exactly what is moving and warping, and what may be getting out of whack. You can use ctrl-z (command-z on a mac) to undo one move, but if you move things to fast and realize that two steps ago you may have moved a section too much, then you will need to cancel and start over.
I use the Puppet Warp command to edit small areas of my image that need fine tuning, where the regular Warp command doesn’t work, or where I need a bit greater control than I can get with the Liquify brush. Give it a try and see what you can do with the Puppet Warp command!
It appears as if I blew away the sample of the girl after Puppet Warp, but here are two quick examples of before and after Puppet Warp:
