I have been promising folks a description of what I do in Photoshop with some of my images. I usually do some combination of a number of things-
- adjust sizing and sometimes proportion
- adjust images that are skewed either because of scanning issues or because of drawing issues 😉
- adjust brightness or contrast
- adjust colors on all or a portion of the image
- select and copy parts of images
- combine images using blend modes (my favorite- I can do this for hours!)
- paint additional strokes for color or design or filling in spaces
- add text
- a myriad of other things, but those listed here are typically what I use on a daily basis
So I thought it might be fun to walk through a series of steps and share what Photoshop tool I used and then see the results. However, instead of using a Photograph, I am going to start with an drawing I made. I have been practicing drawing female faces, and while I have progressed over this year, I still have a long way to go. Since I can work Photoshop like nobody’s business, I can usually get my drawings to a somewhat more acceptable level on the aesthetics scale ;-).
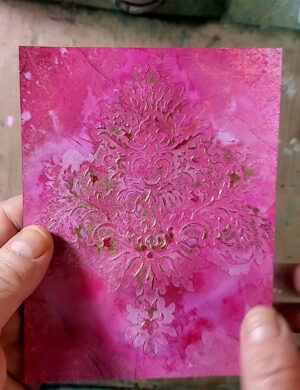
Along the way, we will learn tricks to take a black and white drawing and add color, highlights, pattern etc. You could also use those same skills to go the other way around- for instance, take a color drawing and make it black and white. You can still add texture and highlights, etc and so you could go from something like this…

to something like this…

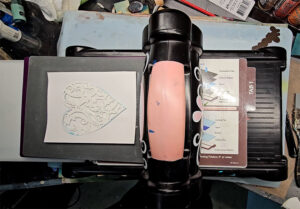
So here is the original drawing that I am going to work on iduring the course of this series It definitely needs some help, not to mention color! So join me next week to see where we go from here!

As an FYI- I will be doing all my work in Photoshop CS6. So tools might not be available in previous versions.
Before we go further, if you are brand new to Photoshop, you really need to understand Layers first. I am making the assumption that you have worked in Photoshop before, at least a little, and know enough so that you can open image documents, and work with multiple image documents/windows open all at once in Photoshop.
Layers work the same in Photoshop as they do in normal scrapbooking (or card making or or Art Journaling or other Mixed Media projects). If you layer a piece of paper over another, the top layer will show, and any paper underneath that top layer, that is not covered by it, will show as well. The bottom layer that is covered by the top layer will not show (because that portion of it is hidden underneath the top layer).
The right hand side of PhotoShop has a panel call the Layers Panel. If you do not see the layers Panel, then you should go to the top of PhotoShop and choose Window->Layers . You should see a check mark next to the word Layers, if you want the layers panel to show. To have multiple layers in one document, you can either:
- Open a second image and drag any layer (there may only be one) from that document onto the stop of the first image document.
- Open a second image and Choose Select->All, then Edit->Copy. Now click on the first image window and choose Edit->Paste.
- In your current image window, choose Layer->New-> Layer. Now click on that layer in the layers panel on the right hand side, and then choose the brush tool (quick tip- just type the letter “b” to get the brush). Now just scribble/paint on that new layer.
- Click on the type tool (quick tip- just type the letter “t” to get the type tool) and type some words. That will create a new Type layer. This will be a vector layer rather than a raster layer, which is what photographs and working with the paint tool results in, but we don’t really need to worry about that now. We are just trying to get a handle on layers.
When you can see the Layers panel, you need to get in the habit of clicking on the layer that you want to make edits to. If you are not on the right layer you can screw up your image or tools/commands may not work. There is a checkbox at the top, when you are using the move tool (quick tip- type the letter “v” to get the move tool), that says “auto-select”. If that is checked, when you click on an item, it will auto select the layer that the item is on. I like this turned on, but sometimes that can be confusing to folks, so if you are seeing weird things happen when you are using layers, check on the right hand side to make sure you are on the correct layer. To be sure, you can always work with the checkbox turned off, and just get in the habit of always clicking on the layer you want to work on.
The first thing you should get in the habit of doing is making a copy of the original layer. Click on the layer thumbnail to make sure you are on the correct layer. Use control-J (command-j on a Mac). You can also right mouse button click on the layer in the layer’s panel and choose Duplicate Layer. Go back to the the original layer, and then click on the eye icon to the left of the Layer Thumbnail. That will shut visibility off on that original layer so you won’t be tempted to do anything to that layer any more, but it is always there so you can go back to it if you need to. Click the eye icon again to turn visibility back on, if the need arises.
You can have lots of layers. The more you have, the larger your file. There are ways around having larger Photoshop files like using Adjustment Layers and doing edits on blank layers that can save you on the file size. But when you are first starting out, just understand the layers concept and you can worry about file size later, when you are rocking it& ;-).
Up near the top of the layers panel there is an opacity slider. You can change the opacity of a layer as well. Click on the layer thumbnail to select a layer (and make sure the eyeball icon on the left is on, so that layer is visible). Change the opacity of the layer by scrubbing the opacity slider back and forth. If you lessen the opacity, then you can make the layer more translucent. If that layer is on top of another visible layer, then it will be similar to the effect of layering vellum over a piece of paper. You can start to see through that layer to the layer below. If you slide the opacity all the way down, it will become invisible and give you the same effect as shutting the eye icon off. You won’t see that layer. It will be like a layer of acetate ;-).
Hopefully the concept of layers makes sense! If you have trouble understanding it, take some paper and read the layers section again with the papers in front of you, and a Photoshop document with multiple layers open. Now play around until it makes sense. You will only get frustrated if you try to move on, without understanding the concept of layers and how they work.
Join me next time to see how the Liquify tool can help re-shape a drawing.