Yet again, Tim Holtz (http://www.timholtz.com/) has inspired me!! Here’s the story:
My friend Linda, one of the owners of Ink About It , was playing around with some of the Easy Scraps’ rubber stamps. She commented that I should make them like Tim Holtz new unmounted rubber stamps, where the back of the stamp has the image index printed on the mounting foam. (Genius!!) I laughed and said I wished I had Tim’s manufacturing prowess, because then I certainly would do that! We went on and made some cool projects and that was that.
Well, not quite! Driving home, I had an idea ![]() ! I had new Easy Scraps rubber stamps that had just arrived, and I had Sunday International EZ Mount foam, which is what I use to mount my stamps. For more information on mounting rubber stamps, please visit our Gallery and check out the tips section.
! I had new Easy Scraps rubber stamps that had just arrived, and I had Sunday International EZ Mount foam, which is what I use to mount my stamps. For more information on mounting rubber stamps, please visit our Gallery and check out the tips section.
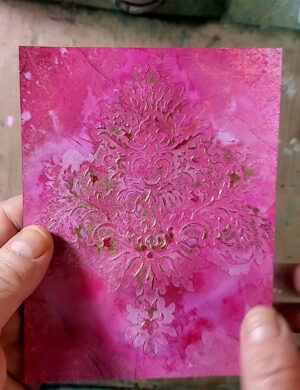
I also had Stazon Ink!! Stayzon will work on non- porous surfaces, why not the cling vinyl side of the EZ Mount foam? So I cut out one of the stamps from the new Easy Scraps Mixed Seasons unmounted rubber sheet (find it at http://www.easyscraps.com/Rubber-Stamps/Rubber-Stamps-for-Scrapbooks.html) . I inked the stamp with black Stayzon Ink and stamped onto the cling vinyl side of the EZ Mount foam. Then I cut out the foam, peeled away the protector from the sticky side and adhered it to the rubber stamp.
Technique tip: This is not an exact science, and won’t be as perfect as it would be if we could manufacture the stamps like Tim ![]() I had to eyeball the alignment matching them up from the sides, starting with the top left and then going to the bottom right. The big stamps are easier to mount than words, but if you have a little patience it will work. You can pull the stamp away from the foam and re-seat it if you need to.
I had to eyeball the alignment matching them up from the sides, starting with the top left and then going to the bottom right. The big stamps are easier to mount than words, but if you have a little patience it will work. You can pull the stamp away from the foam and re-seat it if you need to.
I stamped and cut each stamp separately to save on some of the mounting foam, except in the case of the two new sets that are just words and letters. For those sheets, I inked the entire sheet and stamped the sheet. I still cut and mounted the stamps separately this time. I am going to try to stamp and then also mount a full sheet and then cut the foam and stamps together. I will report back on how that works in the comment section. NOTE: See my update below in the comments section. I do NOT recommend mounting the entire sheet and then cutting.
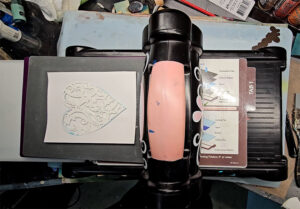
It can be a bit more time consuming doing the stamping along with the cutting, but I think it was worth it. See the results above. Now it is a bit easier to align the stamps if I am in a hurry, and don’t want to pull out my stamp positioner.