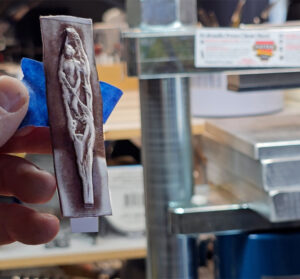
Hi everyone! Today is another quick Take Five project using two Gelli Plates. I made another post/video with a similar process using a stencil. This time I’m going to use a mask with this technique.
You’ll need 2 Gelli Plates, a mask and some paint. I use a brayer to roll the paint onto the Gelli Plates so that is useful too 😉 .
I’m using paint in contrasting colors and I’m just going to roll them onto each of the plates. Please visit the original post to find out more about the paint I am using. On plate 1 I am using teals and turquoise colors. And then I roll my brayer onto a separate scrap piece of cardstock. If I get some of the colors mixed in, I don’t really worry all that much. Next, I brayer the other paint colors on the second Gelli Plate. So now I am left with pretty heavy coverage of paints in contrasting colors on both plates.
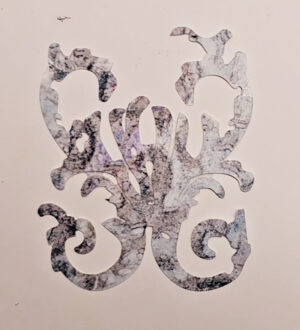
The next step is to take a mask and put it down on the first Gelli plate. Then I flip the other plate on top. Try not to do what I did in the video and drop it, haha.
I then press on that Gelli Plate sandwich, which will blend the colors a little bit. After I lift the top plate off, I have transferred the paint on the top plate onto the mask and the bottom plate, and some of the bottom plate’s paint mixes into the top plate. The top plate can sometimes be a throw away, especially when there is a lot of paint involved. But I like the randomness of the colors- especially on the mask.
I leave the mask in place, push the plates together and then take a sheet of cardstock and place down on top of both of the plates. If the plates are too large for one sheet of paper to cover, you can use individual pieces of cardstock. I use my brayer to roll over the cardstock to help transfer the paint to the paper. You can use your hands if you’re more comfortable doing that. Pay special attention to the areas around the mask to make sure you pick up the outlines and details on the mask. When the paper is lifted, if you are lucky, you will be left with the imprint of the mask with the colors from the top plate over the paint that was on the bottom Gelli Plate. The opposite side of the paper receives the paint from the bottom Gelli Plate over the paint from the top Gelli Plate. It sometimes gets an imprint of the mask, but generally it seems to be kind of a throw away- probably because I use a LOT of paint! So most of the time it ends up as just a lot of paint with both sets of colors mixed and maybe a hint of the mask. At this point I can lift the mask off the bottom Gelli Plate now and I could use that on a different project or even on a plain sheet of cardstock. But I could also use it on the “throwaway” half of the cardstock. I can use the mask either as is with the paint from the top Gelli Plate (and which matches this “throwaway” print), or if the print has very little of the shape of the mask, you can flip the mask over and that side has the contrasting colors from the bottom Gelli Plate. Each time is different, but it’s all fun and quite addicting (as usual!) when you play around with Gelli Plates! Enjoy!