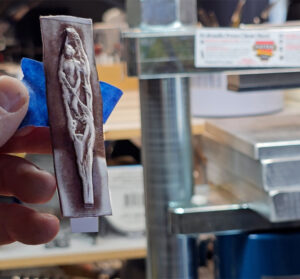
Hello my jewelry friends! Today I have an update on my clamping system scenarios. I started this journey with a Knew Concepts Bench pin, and their rotating GRS plate that attaches to the bench. Then I added the Swanstrom and Gary’s clamp, which I made modifications to and those changes worked better for what I was trying to accomplish- to saw teeny tiny things, preferably without holding anything in my hands which are super painful from years of computer work. My original choice had been the Easy Saw, but that was out of stock for a while. I have finally received it and decided to set it up for
a test spin. It worked so well!
My set up is as follows:
- I purchased the additional aluminum adapter that has a 4 inch hole in the middle along with the Easy Saw.
- I use the Swanstrom or Gary’s clamp (with my tweaks) to hold my teeny tiny pieces of metal. I needed to add additional nuts to the bolts I switched to on these clamps because it didn’t want the bolts poking out the bottom and scratching the aluminum adapter. This was necessary for the next step.
- I then clamp the Swanstrom or Gary’s clamp to the adapter on the Easy Saw.
- I switched out the bolts that came in the clips for the adaptor for bolts that had an allen wrench top so I could screw them by hand if I wanted or use an allen wrench if I needed to further tighten, but that is not necessary.


The only thing that I will point out with the Easy Saw is that because of the wings that help you move it around, you do need a deeper saw. I was using a three inch saw. You need a five inch saw. If you look at all the information on the Easy Saw site, it clearly goes over all of that.
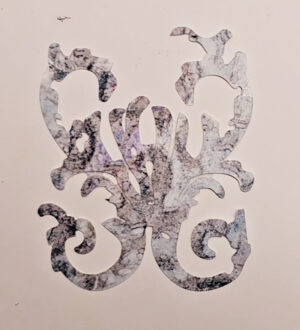
For my test piece I sawed around the whole thing in one shot! This Easy Saw just twists like a dream. The clamp and the metal piece in the clamp were held in place really nice and solidly. Nothing moved even a single millimeter while I was sawing. My sawing was still not the greatest, but it was the closest I’ve gotten to this design yet. I was left with just a little bit of clean up, but my hand did not hurt. I felt like I could saw all day with this setup. And again with trying to saw out teeny tiny pieces, I feel like I’m still going to need to clamp the smaller clamps to the Easy Saw Adapter as my go-to setup.
With bigger pieces or pieces where there’s a lot of excess metal, the smaller clamps would not be necessary. The Easy Saw, especially with the 4 inch hole adapter, would be sufficient.

I am super excited for this setup and if you would like, go check it out at https://www.easyrotatingclamp.com/. There are other videos where the Easy Saw is demonstrated, including on the site itself. The setup and usage is there and even the adapters are discussed.
If you are in need of a clamping system, I hope my journey during this series has helped.
Enjoy!
I am attaching a quick update on how I use just the 4 inch adapter without the Swanstrom or Gary’s clamp with the screw top bolts. Works so well- even one handed in the video. Although usually I have both hands and so it is even easier! I forgot to mention that with this set up, you can even get by with a smaller saw- you just have to unclamp and move the piece, and re-clamp a lot more often. But it is do-able.


Enjoy!


