Hi everyone! Today I am taking a break from Yupo paper cutouts because I am in Holiday Card making mode! I am making a series of cards for a nursing home project, and I decided to play around with a bunch of different techniques so that I could have several designs. One of the techniques I am playing with is using Laser prints and transferring them via the Gelli Arts Printing Plate. With this technique (as with many Gelli Arts sessions quite frankly), you are never sure what you will end up with. The whole session is fun, exciting and serendipitous. As with all Gelli Plate printing sessions, you also end up with lots of prints, and leftovers! So, in this video I also show you how I use the leftovers.
The Laser transfer technique starts with a laser print (not an inkjet print) in black and white, as high contrast as you can make it. Then you roll paint onto the Gelli Arts Printing Plate in a thin coat. Just enough paint so that the Gelli Arts plate is just covered. Paint matters here- in general we are used to using any old paint for printing sessions, but with the laser transfer cheap paint doesn’t seem to work well. My best results come from using Golden regular acrylic paints. The fluid also works, but you have to move fast. I have had some success with Liquitex and Amsterdam, but those paints tend to be thick and not nearly as easy to roll out as the Golden paints. You can use more than one color for this step (and any color you like) but when starting out and for line work, you are probably best just sticking with a single color.
Once the paint is rolled out, place the laser print face down onto the paint covered plate and use your hands or a brayer to smooth the print and make sure there is good contact. Then peel up the print and the image should be left on the plate. The paper absorbs the paint, but the laser toner does not leaving the image behind. This can take a bit of trial and error to get a feel for paint amount and timing. Too little or too much paint will not work. Some paints won’t work. So if you are having trouble try a different paint!
The next step is to roll more paint over the top of the image transfer. Don’t wait too long for this next step or the new paint could lift off the paint that was transferred. If you get caught up picking colors, or the phone rings etc, you are better waiting until the paint completely dries before rolling more paint over the top of the transferred image. You can use one or more colors in this step, but contrast with the paint color that you used for the transfer is best. If that paint was dark go with light colors to roll on top, or vice versa.
Once your paint has been rolled over the transferred image, place the paper you wish to use onto the Gelli plate. I just usually grab white card stock but you can use other papers like tissue, or even painted card stock from previous Gelli plate sessions. Brayer or rub the back of the paper to get good contact. You can leave the paper a few minutes to make sure it grabs all the paint.
When you lift up the paper the image should be transferred to the paper!!
Now what to do with those leftovers? The laser printed paper? Use a wipe that will lift acrylic paint or a rag/paper towel and rubbing alcohol and start wiping off the paint. You might need a bit of muscle here, but be careful if your printed paper is thin that you don’t tear it. Wipe off as much paint as you like so that you can see the laser printed image again. I usually spritz or rub with inks or paints to dress it up a bit.
Sometimes I scan the transferred print and the leftover and work with them in Photoshop to get a completely different look. This process will eat up lots of your free time- perfect for keeping busy in the middle of a pandemic!
Here are some examples and the video showing one of my sessions. Enjoy!
This is the one I worked on in the video…

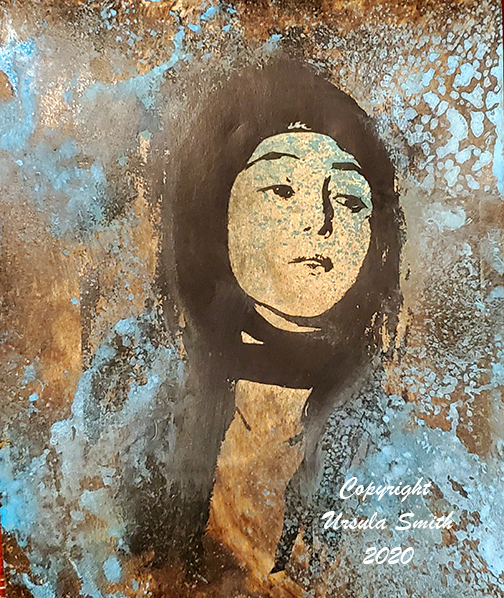
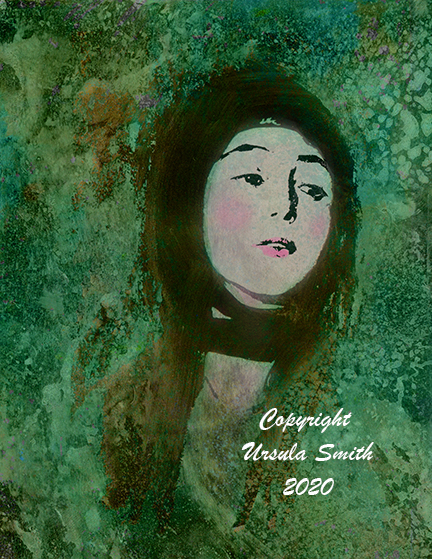
I brought the images into Photoshop, combined with different blend modes and came up with this…
Here is an image of a house drawn by my daughter…


Again, I brought the two images into Photoshop and added some color. I printed the image below onto shrink plastic to make jewelry for my daughter’s friends…

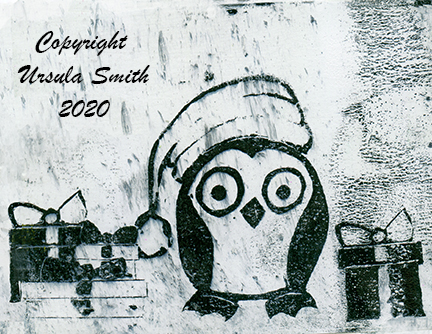
And for those in the Holiday mood…
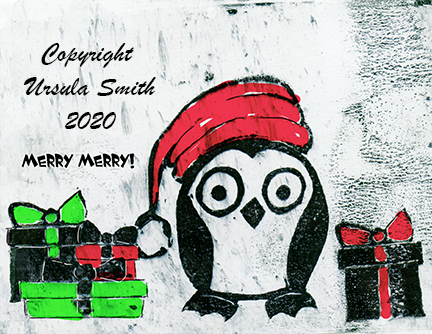
Added some color…
Brought it into Photoshop to combine with a collaged page…

Hope you enjoy the video! Good luck with your Gelli plate transfers!


Thanks for your info! I’m trying to find out why my prints are not transferring
All mine does is put the paint on the paper. The image does not transfer. I am using a lazerjet
Hi! Figuring out what is causing the image not to transfer is tricky. Sometimes it is the printer itself- whether the ink will repel the paint. And sometimes there is either too much or too little paint. It sounds like maybe you might have too much paint, so it is overpowering the ink from the laser print? Try a little less paint or thinner paint. Also, I changed my way of doing this a bit and explained it in this post- https://ursula-smith.com/laser-transfer-method-gelli-arts-plate-tweak/ . I added a little bit of alcohol ink to thin the paint. Hope that helps!